Vietnam e-Visa
e-Visa / ETA Asia | Việt Nam e-Visa
September 16, 2026
✈️ Before You Go
Vietnam’s e-Visa is your digital entry card for most nationalities, covering single or multiple entries up to 90 days. Forget the official “3 working days” promise—real-world processing usually takes 4 to 7 business days, sometimes longer during peak holidays like Tet. Apply at least two weeks ahead. But something the official instructions rarely mention: The e-Visa is not automatically linked to your passport; you must print a physical copy and carry it with you, because many land border officers will ask to see the paper, not just the QR code on your phone. Also, the arrival stamping line at Hanoi or Ho Chi Minh City can take 30–60 minutes even with the e-Visa, so don’t book a tight connecting flight. Seasoned travelers suggest when filling the “port of entry” field, choose the exact airport or land checkpoint you’ll use—if you list the wrong one, you may be denied boarding. Double-check every letter of your name matches your passport exactly, as even a single typo can cause a hefty fine or refusal at immigration.
⚠️ Important Notes
Application Window
Apply at least 3-5 business days before departure. Approval takes approx. 3 business days.
Cost
USD 25 (single entry)
Fees are subject to change — always confirm on the official site.
- • Always use the official website — countless fake agency sites charge excessive fees
- • Vietnam e-Visa is currently available to travelers of all countries and regions
- • Upload your passport photo and a 4x6cm white-background ID photo — non-compliant photos will be rejected
- • The entry checkpoint must match exactly what you selected in the application — otherwise entry will be denied
- • After approval, print a paper copy and carry it with you — electronic-only may not be accepted
- • Official processing takes about 3 business days — apply at least 5-7 days in advance to allow for delays
- • Name format: match the MRZ strip on your passport. Multi-part names may need to be concatenated — check the machine-readable zone
- • Date format is DD/MM/YYYY (day/month/year) — do NOT use US format MM/DD/YYYY
- • Visa validity starts from the entry date you specify in the application — do not arrive before the validity start date
- • The portal moved to the new domain evisa.gov.vn (per official notice) — submit applications and check results there; the legacy domain now only carries the migration notice. New portal defaults to Vietnamese, with English in the language menu
📋 Application Field Guide
| Field Name | Tips & Notes |
|---|---|
Full Name Full Name | As per passport. Check MRZ strip on your passport for exact spacing. |
Entry / Exit Checkpoint Entry / Exit Checkpoint | Must be exact. Cannot be changed after submission. Choose carefully. |
Date of Entry / Exit Entry / Exit Date | Format DD/MM/YYYY. Visa validity starts from your stated entry date. |
Step-by-Step Application Guide
💡 Before You Start
Have the following ready: your passport, a recent digital photo (4x6cm, white background), and a valid credit/debit card. Use the official website only (https://evisa.gov.vn/) to avoid scams. Apply at least 3-5 working days before your intended travel date, as processing typically takes 3 working days.
1Account Registration
3fields
Account Registration
3fields
Create an account on the official Vietnam e-Visa portal to start your application.
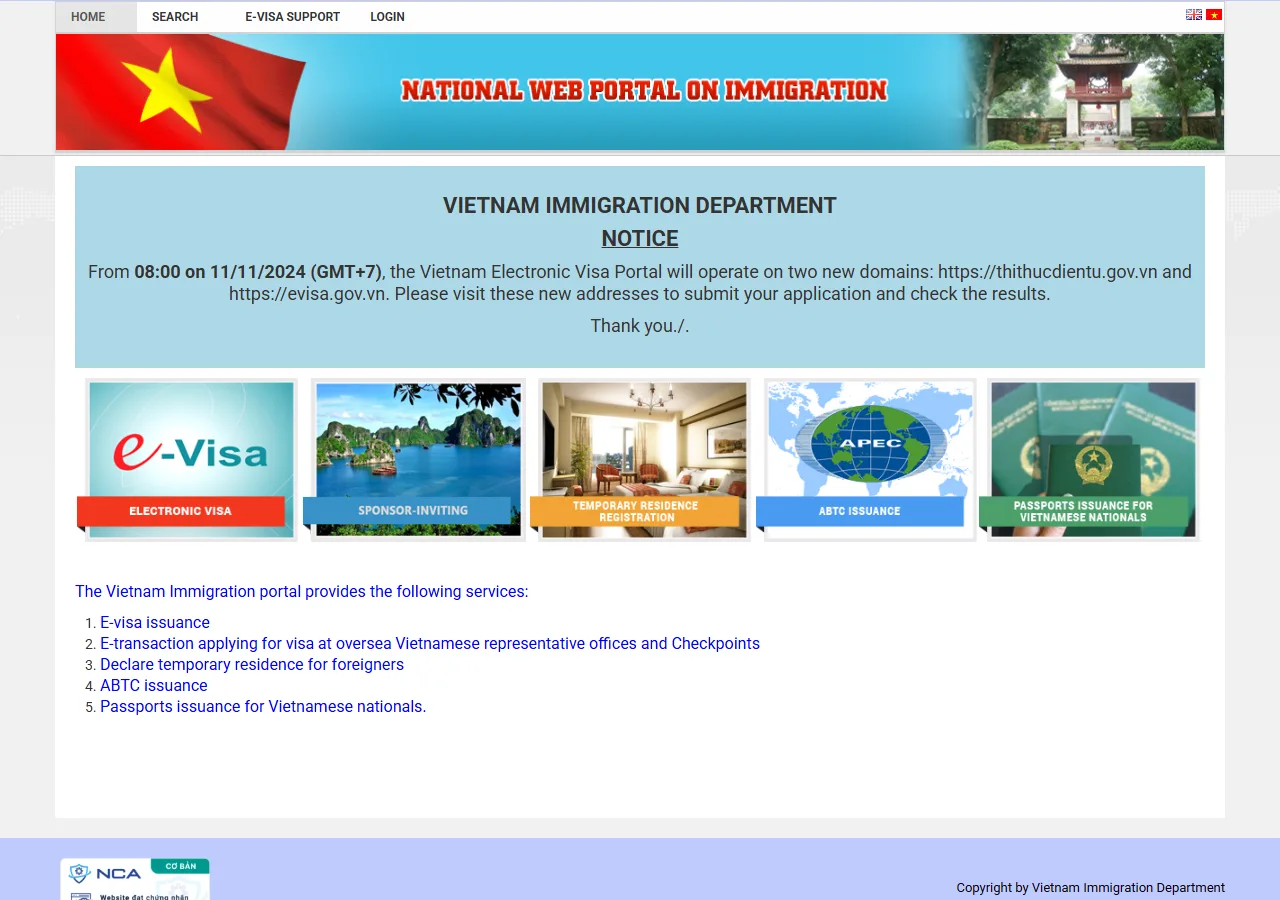
📸 About This Screenshot
This screenshot shows the latest official electronic entry card landing/login page. The step-by-step text guide below is based on the actual form structure, with detailed field instructions and common mistake warnings for your reference.
Email Address
emailRequiredEnter a valid email address that you check regularly. This will be used for all correspondence and to receive your e-Visa approval letter. Use the same email for future applications.
⚠ Common Mistakes
- •Using a rarely checked email address
- •Typing the email incorrectly (e.g., missing dots or @)
Password
passwordRequiredCreate a strong password with at least 8 characters, including uppercase and lowercase letters, numbers, and special characters. Do not use easily guessable information like your name or birthdate.
⚠ Common Mistakes
- •Using a weak password like '123456'
- •Forgetting the password immediately after creation
Confirm Password
passwordRequiredRe-enter the exact same password you entered above. Ensure there are no extra spaces or typos. The system will check for a match.
⚠ Common Mistakes
- •Mismatched passwords due to typos
- •Copy-pasting with hidden spaces
2Personal Information
4fields
Personal Information
4fields
This is where you enter who you are on paper. Pull out your passport and mirror its spelling — even "St." vs "Street" can trigger a mismatch flag.
Full Name (as in passport)
textRequiredEnter your full name exactly as printed on your passport, including any middle names. Use the same order (surname first or given name first) as shown on your passport. Do not use nicknames or abbreviations.
⚠ Common Mistakes
- •Using a different order than on the passport
- •Omitting middle names
Date of Birth
dateRequiredSelect your date of birth in the format DD/MM/YYYY. Ensure it matches your passport exactly. Use the calendar picker to avoid format errors.
⚠ Common Mistakes
- •Entering the date in the wrong format (e.g., MM/DD/YYYY)
- •Selecting the wrong year due to a typo
Gender
selectRequiredSelect your gender as indicated on your passport. Options are typically 'Male' or 'Female'. Choose the one that matches your passport exactly.
⚠ Common Mistakes
- •Selecting the wrong gender due to a misclick
- •Assuming the form uses a different term (e.g., 'M' vs 'Male')
Nationality
selectRequiredSelect your nationality from the dropdown list. This should match the country that issued your passport. If you have dual citizenship, use the passport you will travel with.
⚠ Common Mistakes
- •Selecting the country of residence instead of nationality
- •Choosing the wrong country due to similar names (e.g., 'United States' vs 'United Arab Emirates')
3Passport Details
3fields
Passport Details
3fields
Enter your passport information accurately to avoid delays or rejection.
Passport Number
textRequiredEnter your passport number exactly as printed, including any letters. Do not include spaces or hyphens. Be careful with characters like 'O' (letter) and '0' (zero) — they are not interchangeable.
⚠ Common Mistakes
- •Confusing the letter 'O' with the digit '0'
- •Adding spaces or hyphens that are not on the passport
Passport Expiry Date
dateRequiredEnter the expiry date of your passport in DD/MM/YYYY format. Your passport must be valid for at least 6 months beyond your intended departure date from Vietnam.
⚠ Common Mistakes
- •Entering the issue date instead of the expiry date
- •Using a passport that expires within 6 months of travel
Passport Photo Upload
uploadRequiredUpload a clear, color scan or photo of the biographical page of your passport. The file should be in JPG or PNG format, less than 2MB, and all details must be legible. Avoid glare and shadows.
⚠ Common Mistakes
- •Uploading a blurry or low-resolution image
- •Including fingers or other objects covering the passport details
4Travel Information
4fields
Travel Information
4fields
Specify your intended entry and exit points and dates of travel.
Entry Checkpoint
selectRequiredSelect the exact checkpoint where you will first enter Vietnam. This must match your actual arrival point. Common options include Noi Bai International Airport (Hanoi), Tan Son Nhat International Airport (Ho Chi Minh City), and land border gates like Moc Bai. You cannot change this after submission.
⚠ Common Mistakes
- •Selecting a checkpoint different from your actual arrival point
- •Choosing a land border gate when arriving by air
Exit Checkpoint
selectRequiredSelect the checkpoint where you will leave Vietnam. This must match your actual departure point. You can choose a different checkpoint from your entry point, but it must be one of the approved exit points. Ensure it is correct to avoid issues at departure.
⚠ Common Mistakes
- •Selecting an exit checkpoint that is not approved for e-Visa
- •Mismatching the exit checkpoint with your actual departure plan
Date of Entry
dateRequiredEnter the date you plan to arrive in Vietnam in DD/MM/YYYY format. This should be within 30 days of your intended travel. You can enter Vietnam on this date or later, but not earlier.
⚠ Common Mistakes
- •Entering a date more than 30 days in the future
- •Selecting a date that is before your application approval
Date of Exit
dateRequiredEnter the date you plan to leave Vietnam in DD/MM/YYYY format. Your stay must not exceed 30 days from your entry date. Ensure the exit date is after the entry date.
⚠ Common Mistakes
- •Setting an exit date more than 30 days after entry
- •Entering an exit date before the entry date
5Portrait Photo Upload
1fields
Portrait Photo Upload
1fields
Upload a recent passport-style photo that meets the specified requirements.
Portrait Photo (4x6cm, white background)
uploadRequiredUpload a recent color photo (taken within the last 6 months) with a plain white background. The photo must be 4x6 cm in size, with your face centered and clearly visible. Do not wear glasses or head coverings unless for religious or medical reasons. The file should be in JPG or PNG format, less than 2MB.
⚠ Common Mistakes
- •Uploading a photo with a non-white background
- •Wearing glasses or having shadows on the face
6Review and Submit
2fields
Review and Submit
2fields
Review all entered information, pay the fee, and submit your application.
Declaration Confirmation
radioRequiredCheck the box to confirm that all information provided is true and correct. This is a legal declaration. False information can lead to visa rejection or entry denial.
⚠ Common Mistakes
- •Skipping the declaration and not being able to submit
- •Not reading the declaration carefully before agreeing
Payment
selectRequiredSelect your payment method and complete the payment of 25 USD for single-entry e-Visa. The portal accepts major credit/debit cards. Ensure you have sufficient funds and a stable internet connection. After successful payment, you will receive a confirmation email.
⚠ Common Mistakes
- •Using a card without international payment enabled
- •Closing the browser before payment is confirmed
💬 Travel Experience Exchange
Applying or already traveled? Share your entry/exit experience, real problems encountered, or recent changes to help fellow travelers — our editors will also respond regularly.
- Share pitfalls or surprises during your entry process
- Let others know about recent entry procedure changes
- Read the guide and warnings above before asking
💬 Leave a comment
Just enter your name and comment.